Code and Circuit for RFID Based Smart Lock System With Node Mcu
RFID Access Control with ESP8266 & Blynk 🔐
In this project, we will use the ESP8266, RFID, Blynk, and a Relay to create a smart RFID lock system. You’ll be able to control the lock remotely and monitor access via Blynk. Follow the steps below to get started!
🔗 Libraries & Resources
Here are the libraries and tools you’ll need for this project:
- Blynk Library: Download here
- ESP8266.h Library: Download here
- WiFi Manager Library: Download here
- MFRC522 Library: Download here
- NodeMCU Board Manager URL:
👉 http://arduino.esp8266.com/stable/package_esp8266com_index.json - Arduino IDE: Download here
🎯 Purchase Links for Fully Coded Combos
💻 Code
Below is the complete code to set up the RFID Access System using Blynk and ESP8266:
#include <WiFiManager.h>
#include <MFRC522.h>
#include <BlynkSimpleEsp8266.h>
#define SS_PIN D4 // RC522 SDA pin
#define RST_PIN D3 // RC522 RST pin
#define RELAY_PIN D1 // Relay pin for solenoid lock control
MFRC522 rfid(SS_PIN, RST_PIN); // Create an MFRC522 instance
// Blynk Credentials
#define BLYNK_TEMPLATE_ID “TMPL3IqOSyumx”
#define BLYNK_TEMPLATE_NAME “RFID LOCK”
#define BLYNK_AUTH_TOKEN “2JyhP84Oy9wBDYoe21oO6GP”
char auth[] = BLYNK_AUTH_TOKEN;
// Array for authorized users
struct User {
const char* name;
const byte uid[4];
};
User authorizedUsers[] = {
{“Viraj”, {0x06, 0xA9, 0x0D, 0xF0}},
{“Bob”, {0xAB, 0xCD, 0xEF, 0x90}}
};
void setup() {
Serial.begin(115200);
WiFiManager wifiManager;
wifiManager.autoConnect(“RFID_Access”);
Serial.println(“✅ Wi-Fi Connected Successfully!”);
Serial.print(“IP Address: “);
Serial.println(WiFi.localIP());
Blynk.begin(auth, WiFi.SSID().c_str(), WiFi.psk().c_str());
SPI.begin();
rfid.PCD_Init();
pinMode(RELAY_PIN, OUTPUT);
digitalWrite(RELAY_PIN, LOW); // Initially lock remains closed
Serial.println(“🔒 RFID System Ready”);
}
void loop() {
Blynk.run();
if (!rfid.PICC_IsNewCardPresent() || !rfid.PICC_ReadCardSerial()) {
return; // No card detected
}
Serial.print(“Card detected! UID: “);
for (byte i = 0; i < rfid.uid.size; i++) {
Serial.print(rfid.uid.uidByte[i] < 0x10 ? ” 0″ : ” “);
Serial.print(rfid.uid.uidByte[i], HEX);
}
Serial.println();
bool authorized = false;
for (const auto& user : authorizedUsers) {
if (memcmp(rfid.uid.uidByte, user.uid, 4) == 0) {
Serial.print(user.name);
Serial.println(” has entered.”);
// Relay ON (Unlock door)
digitalWrite(RELAY_PIN, HIGH);
delay(5000); // Door stays open for 5 seconds
digitalWrite(RELAY_PIN, LOW); // Lock the door again
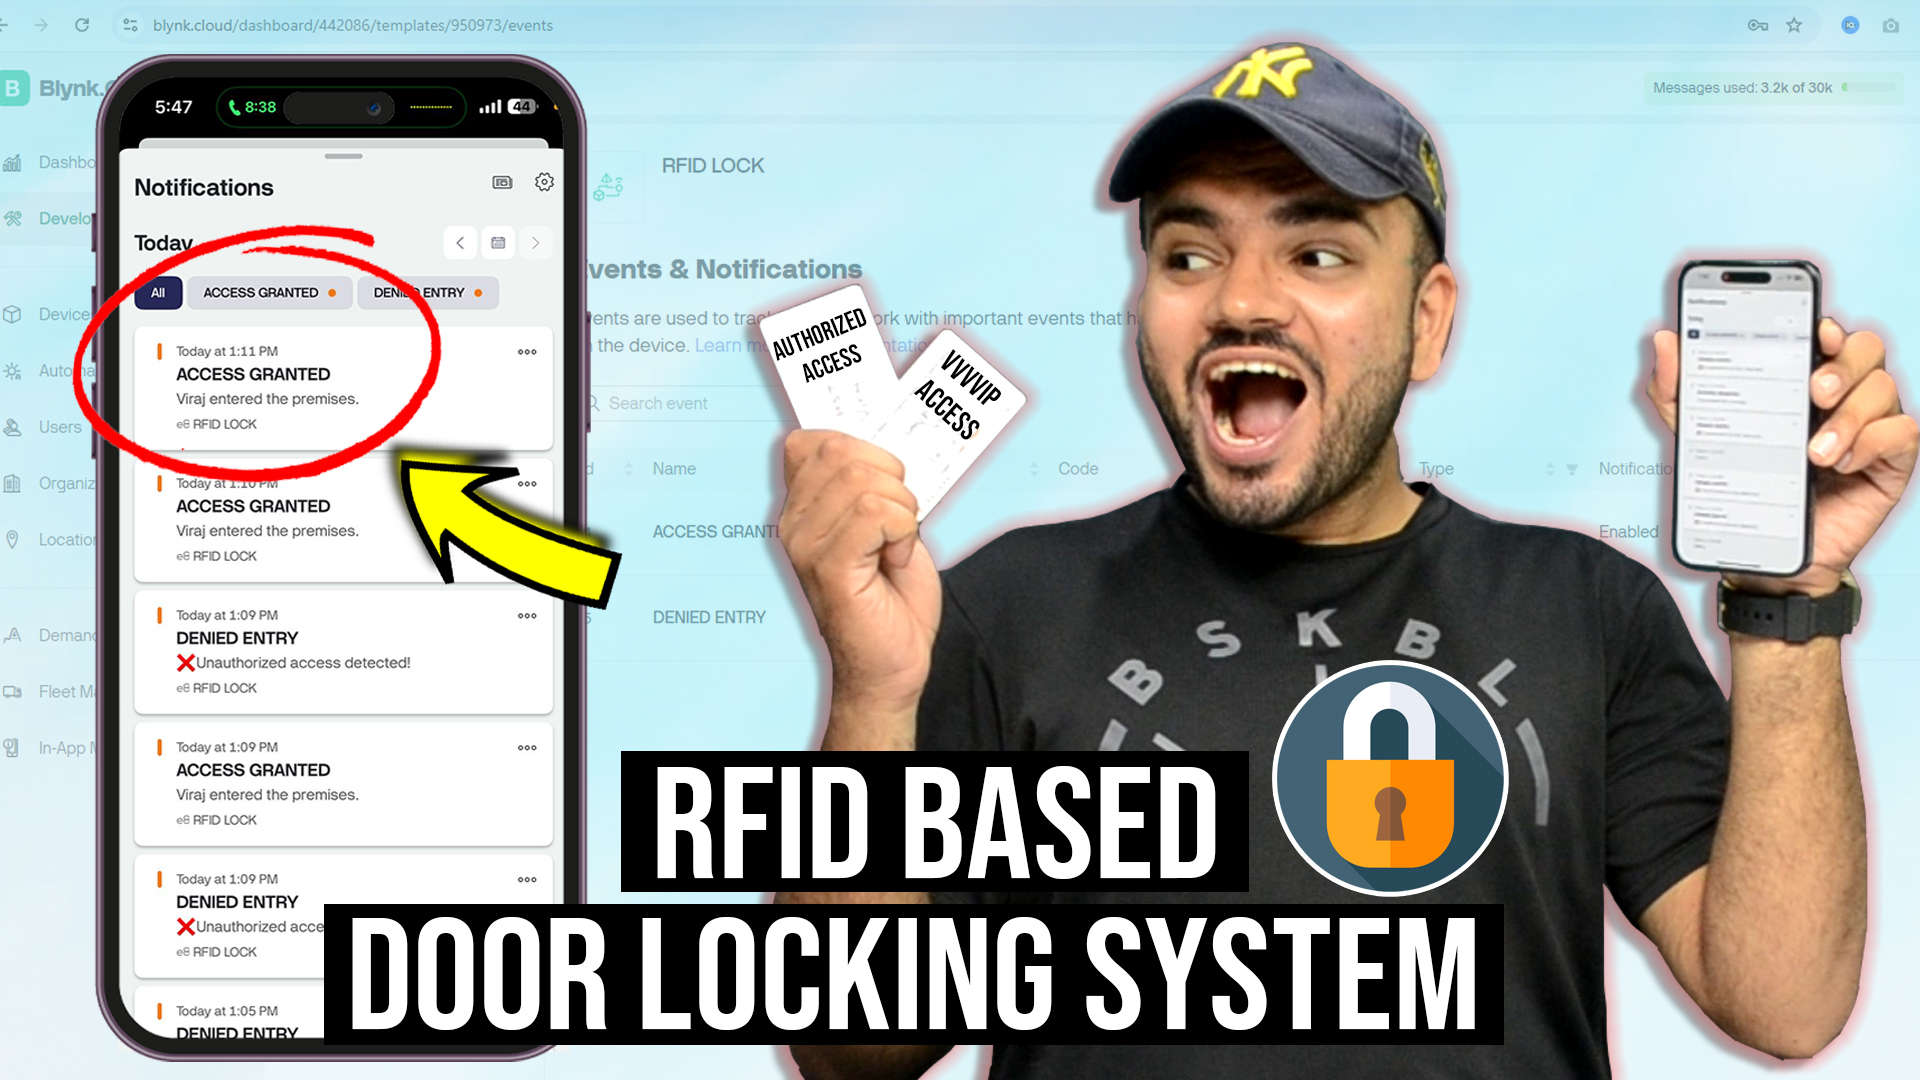
Blynk.logEvent(“attendance”, String(user.name) + ” entered the premises.”); // ✅ Authorized Notification
authorized = true;
break;
}
}
if (!authorized) {
Serial.println(“❌ Unauthorized access detected!”);
Blynk.logEvent(“security_alert”, ” ❌Unauthorized access detected!”); // ❗ Unauthorized Notification
}
rfid.PICC_HaltA(); // Stop reading
rfid.PCD_StopCrypto1(); // Stop encryption on the RFID reader
delay(2000);
}
If you are getting a stray errror download the code from here
Circuit Diagram
Below is the connection between the components:
- RC522 to ESP8266:
- SDA → D4
- SCK → D5
- MOSI → D7
- MISO → D6
- RST → D3
- VCC → 3.3V
- GND → GND
- Relay to ESP8266:
- IN → D1
- VCC → VCC
- GND → GND